
Photo by Jakob Owens on Unsplash
StageHand-A discord bot to make your movie nights better
How to make a discord bot
Discord like a lot of other video chat platforms saw a huge increase in its members during the past year. I too joined the service last year to connect with my friends for longer durations. A new feature that I found in Discord that blew me away was the bots. There were bots for everything, from playing music to moderating servers. I was amazed at how bots could do so much with just chat commands. So I got quite curious about how these were made. I love watching movies with my friends. Hence it only seemed fit, that I write my first Hashnode article on how I went about developing a bot to make my movie nights better.
When I first conceptualized StageHand I mainly wanted to make it a bot that could:
Get information about the movie like the cast, the director, the worldwide box office gross, runtime, etc.
Mute people during the movie
Get some information about an actor
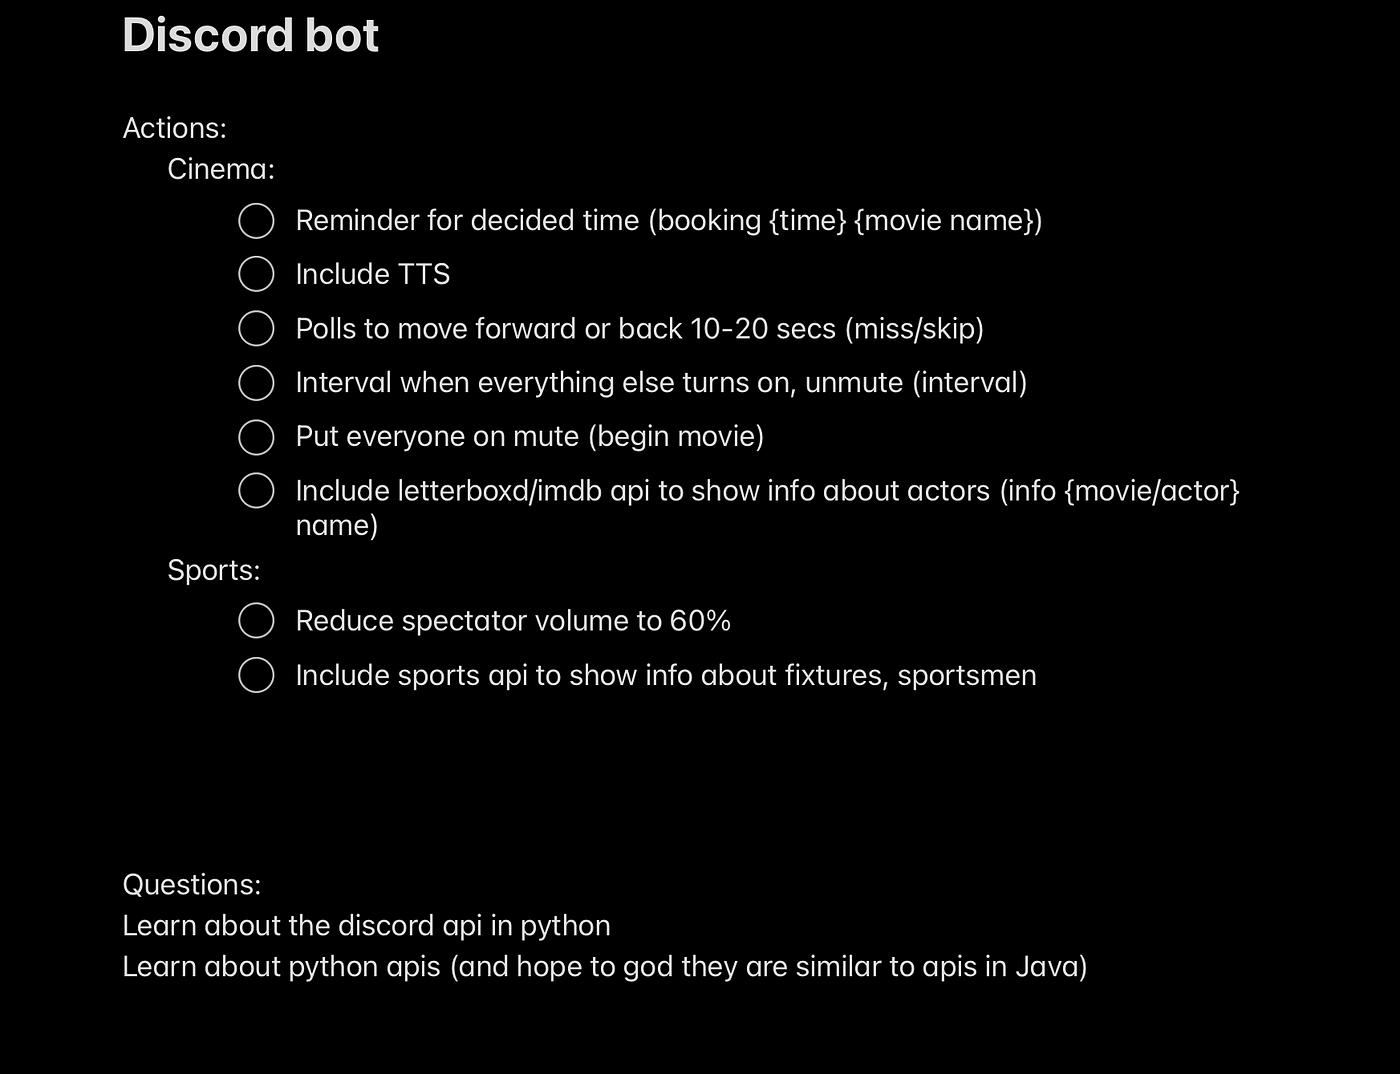
This is what my note looked like during the brainstorming session. So I first had to learn how a discord bot is made. I started by reading this tutorial and watching the video linked to it. The gave me some clarity of how a discord client worked- but I wasn’t making a discord client I was making a discord bot. I had to go down another rabbit hole (some google searches ) to find out about discord bots (This tutorial helped me figure out bots).
CHAPTER 1:
Gathering the resources
To make the bot you will need:
A Discord account
An IDE where you can write and edit your code (I prefer VSCode but it is up to you)
The python compiler (The compiler is pre-installed in many desktops, to make sure you have it open your command prompt and run this command:

If python is installed it will show you the version. If on the off chance that it is not installed you can download it from here. Also, check if pip or any other package manager is also installed. Check for pip with ‘pip – –version’.

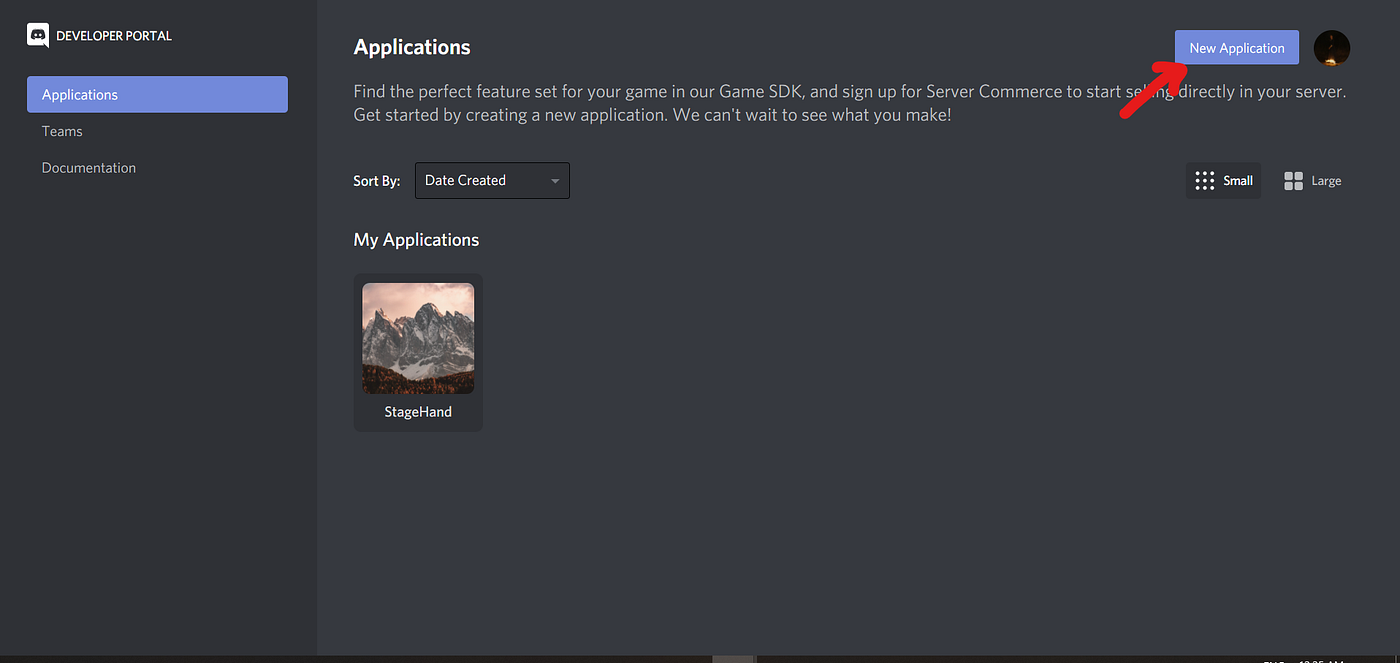
Once you have checked for these resources, we can begin setting up and making the bot. Open the discord developers portal, click on a new application,
put in a name for your bot
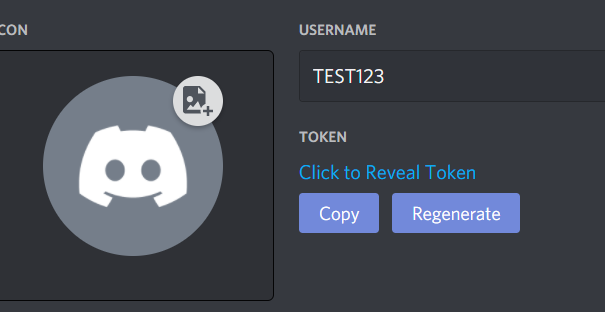
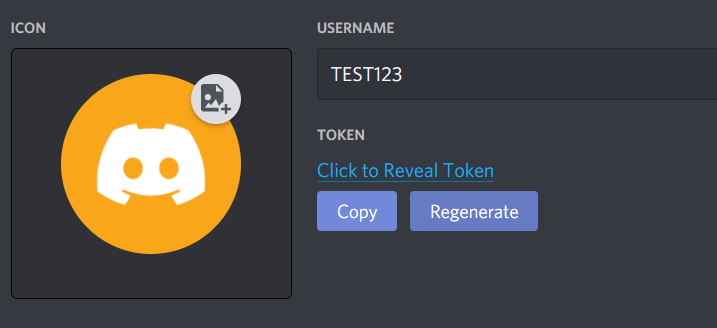
Go to the “Bot” tab and click “add bot”.

Copy the token, you will need it later
To invite your bot to your server. Go to the OAuth2 tab, select bot under ‘Scopes’

Choose the permissions you want for the bot.
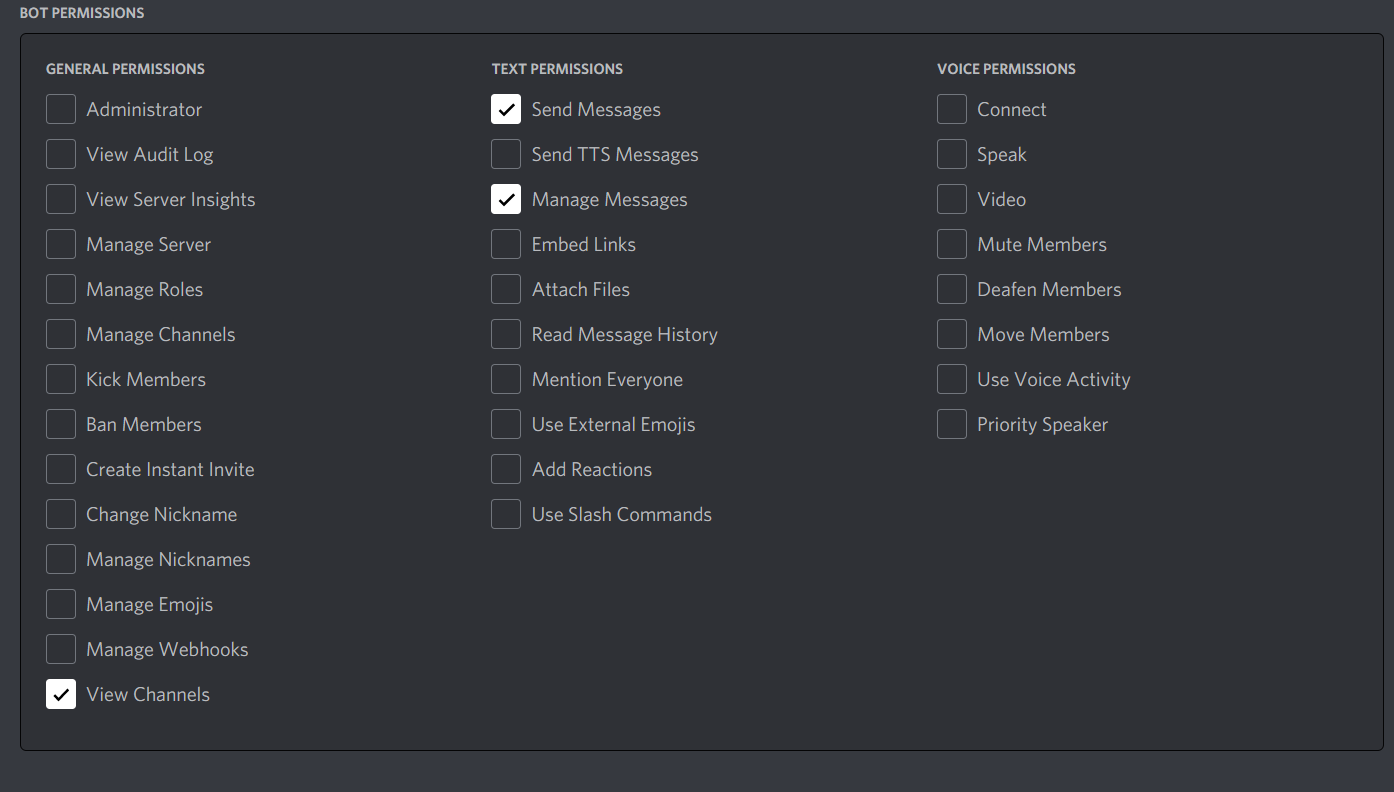
Now press the copy button above the permissions. This will copy the URL which can be used to add the bot to a server. Paste the URL into your browser, choose a server to invite your bot too and click authorize. Once you complete these steps your bot is created and added to your server(yay!!!).
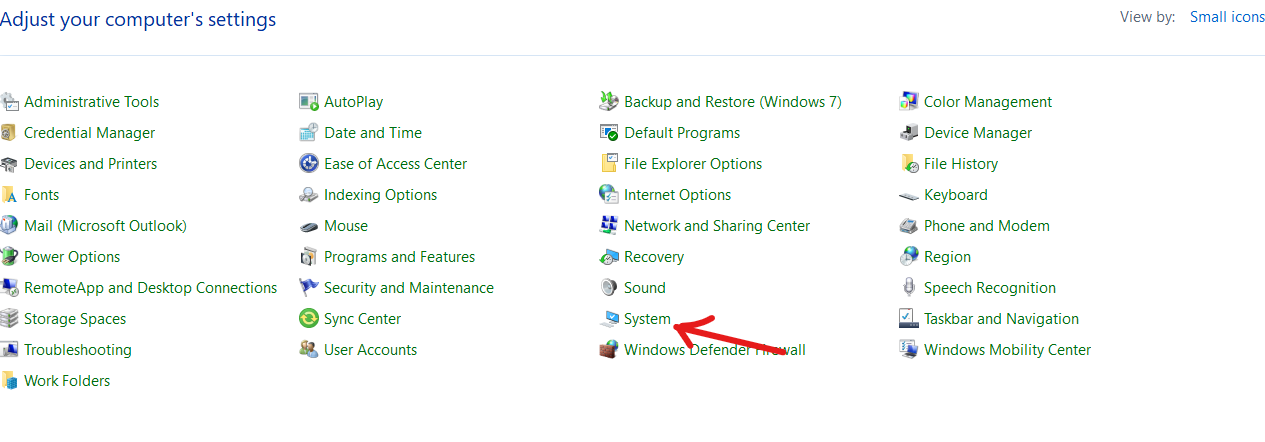
The token acts as your bot’s password so I wouldn’t share it with anyone (if you wish to put your code on GitHub or plan on sharing your code with people, I would recommend hiding it. One way to do this on windows is to navigate to Control Panel, System, and Advanced system settings.
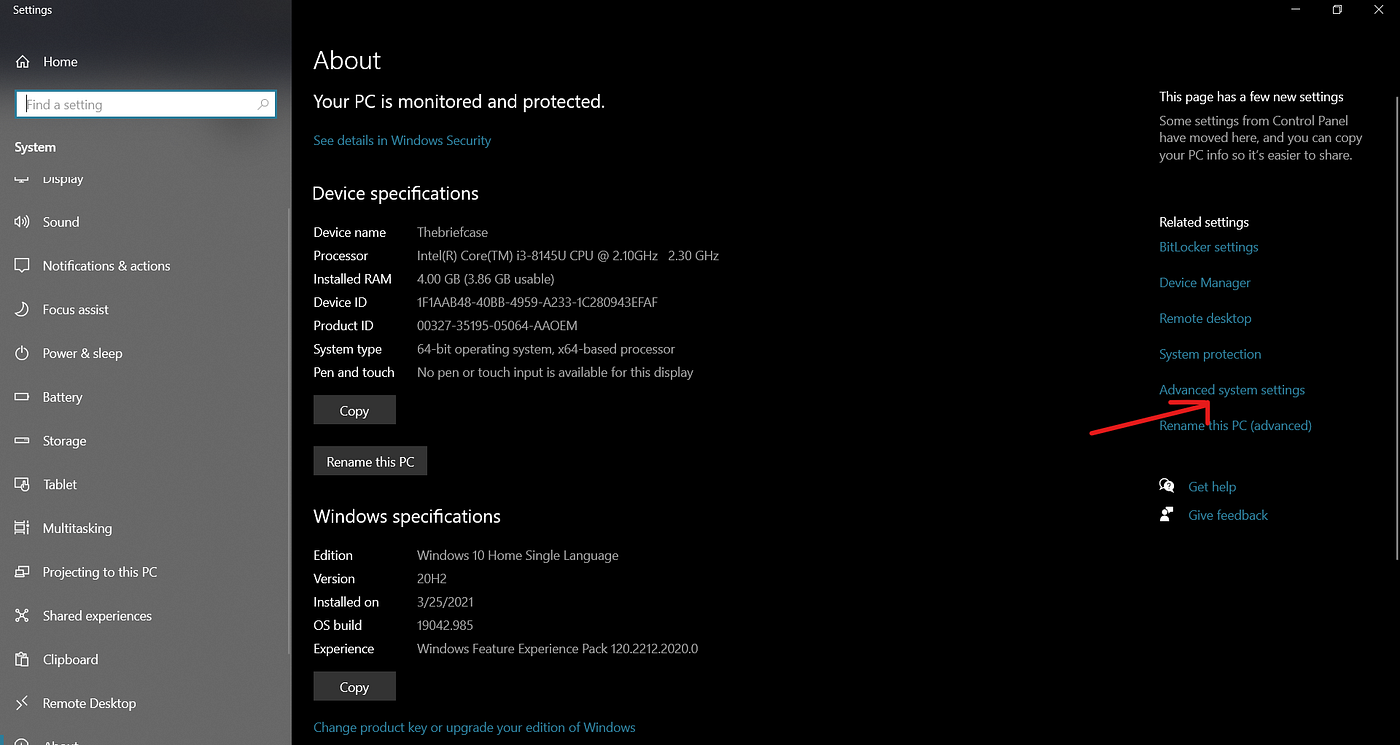
Once this opens click on the Environment Variables button at the bottom right.
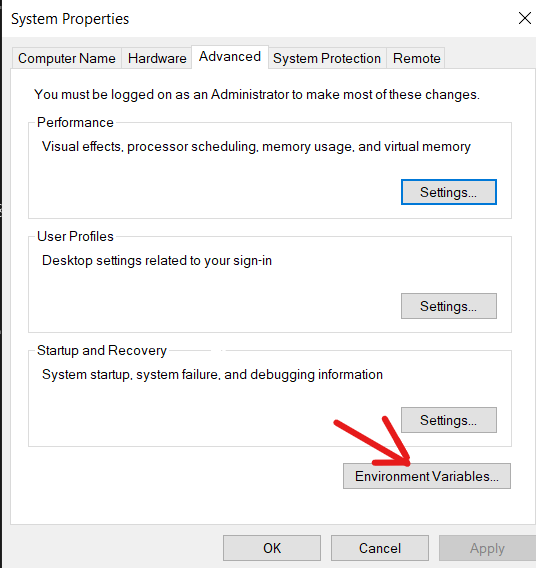
Once you’ve clicked this you should be able to see a panel that allows you to add both system and variable users. You can simply add the key to the user variable. To fetch the key again use the code mentioned below)
import os
DISCORD_TOKEN=os.environ.get(‘Your path variable name’)
#this will get the api key and also hide it from others
Now we need to download the discord module. To do so open your command prompt and type in ‘pip install -U discord.py’. Once the download process is complete import the module to your code.
pip install -U discord.py’
import os
import discord
DISCORD_TOKEN=os.environ.get(‘Your path variable name’)
Let’s make our discord client now. This client will be how you interact with the discord app.
import os
import discord
DISCORD_TOKEN=os.environ.get(‘Your path variable name’)
client=discord.Client()
Create your bot.
import os
import discord
from discord.ext import commands
DISCORD_TOKEN=os.environ.get(‘Your path variable name’)
client=discord.Client()
bot=commands.Bot(command_prefix='~')
#the command prefix is your preference, the server I use this bot in #had other bots with common command prefixes so I had to use the #tilde sign
This means that your bot has been created and is ready to react to commands. The discord.py library is made to work with certain events like when a message is sent or when the bot is ready. Hence when a certain event occurs, you can execute the function that is associated with that event. For eg:
import discord
client=discord.Client()
@client.event
async def on_ready():
      print("I'm ready")
Now whenever the bot is ready for use it will print out “I’m ready”.
Let us write in our first command, this will be a hello world command. Whenever the user types in ‘~hello’ this command will run.
import os
import discord
from discord.ext import commands
DISCORD_TOKEN=os.environ.get(‘Your path variable name’)
client=discord.Client()
bot=commands.Bot(command_prefix='~')'''1''' @bot.command(name='hello')
'''2''' async def helloWorld(ctx):
'''3'''       await ctx.send('Hello World')
'''4''' bot.run(DISCORD_TOKEN)
In line 1: We are giving the command a name (This is what will invoke that particular function).
In line 2: We are defining a python function to tell the bot what action is to be performed when the command is invoked. We have also passed in one argument ctx. A command must always have at least one parameter, ctxwhich is the [Context](https://discordpy.readthedocs.io/en/latest/ext/commands/api.html#discord.ext.commands.Context). The context can be used to get the channel name and the name of the author among other things
In line 3: This is an important line where we are interacting with the discord app. We use the await function which is a coroutine, for the sake of this tutorial just think of this as a way of allowing multitasking within the bot. This allows the bot to perform different events at the same time. The ctx.send is used to send the message to the specific channel which we got the command from.
In line 4: YOU MUST ADD THE bot. run() command which runs the bot. This will take your discord token as a parameter.
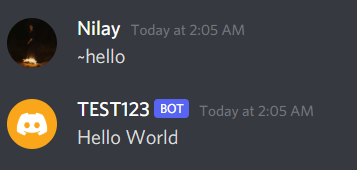
We have now completed your first command.
Chapter 2:
Understanding the imdbpy module
Although I initially wanted to use the IMDb API, turns out there was a module so I felt that it made more sense to do it via the module. You obviously first need to install the module.
pip install imdbpy
Here’s the best documentation I could find for the module. Let’s run over a few details quickly. IMDb works with ids, which means that the main ‘key’ to access a movie, tv-show or actor is via their id. (Fun fact: you can check the id for a movie or a person when you open their imdb page. For eg when you open the IMDb page for Portrait of a lady on fire, you can see its id in the URL, which is: 8613070. The id is usually a 7 or 8 digit number. Sorry for this little tangent now let's get back to the article)
movie=ia.get_movie('8613070')
The ‘get_movie’ function takes the ID as a parameter and then fetches the movie linked to the ID. If you aren’t sure about the ID of a movie, you can use the ‘search_movie’ function which returns a list of movie objects. A movie object has the id and the movie name. Thus to get the id you need to navigate to the first element in the list and then fetch the id.
movieID=ia.search_movie('Portrait of a lady on fire')[0].movieID
print(movieID)
8613070
Sometimes the id may not be returned hence you might want to use a different tool like another api or module (I have also spoken about this technique later on)
To start working with the imdbpy module you need to start with calling the imdb.IMDb function to get an access object through which IMDb data can be retrieved
import imdb
ia=imdb.IMDb()
let us search for a movie to see how this works.
import imdb
ia=imdb.IMDb()
movie=ia.search_movie('Portrait of a lady on fire')
print('movie[0]')
#This is the movie object
<Movie id:8613070[http] title:Portrait of a Lady on Fire (2019)>
print(movie[0].movieID)
8613070
print(movie[0].title)
Portrait of a Lady on Fire
Once we get the movie we can start getting the information we need. For eg., if we need the summary for a movie you can easily get it with the get_movie_synopsis function.
import imdb
ia=imdb.IMDb()
movieID=ia.search_movie('Portrait of a lady on fire')[0].movieID
movie=ia.get_movie(movieID)
summaryJSON=get_movie_synopsis(movieID)
summary=summaryJSON['data']['plot'][0]
print(summary)
On an isolated island in Brittany at the end of the eighteenth > century, a female painter is obliged to paint a wedding >portrait of a young woman.::Dick van Riel
The function get_movie_synopsis returns this in JSON format. Hence you can get the first synopsis. (Be careful because the format also includes the name of the author’s account, so if you are nitpicky you can also slice out the name of the user). Another cool part of the IMDbpy library is ‘information sets’. This returns only some part of the entire JSON object, thus saving both time and bandwidth. If I want to get some specific information about the movie, like its tagline it would be redundant to get the entire movie object and then navigate to the tagline. So as an alternative an infoset is used which only returns the tagline. To get the information set for IMDb movie data you need to pass in an optional parameter to the get_movie method telling it what information you need.
import imdb
ia=imdb.IMDb()
movie=ia.get_movie('0094226',info=['taglines'])
movie.infoset2keys
print(movie['taglines'])
['The Chicago Dream is that big', 'No one messed with Al Capone, but Eliot Ness messed with him', "AL CAPONE. He ruled Chicago with absolute power. No one could touch him. No one could stop him. - Until Eliot Ness and a small force of men swore they'd bring him down.", 'What are you prepared to do?', 'Never stop fighting till the fight is done']
This will only give us the list of taglines. The functions work similarly for actors.
CHAPTER 3
Working with the discord python module
We have already dipped our feet in this topic in the first chapter, let’s foray into it a bit further. For my use, I needed to mute and unmute people in the channel, send a message, add reactions to a message, and after a few seconds also count the reactions and send a message depending on these counts.
We already spoke about sending a message on the channel.(You can do this with ctx.send()). So let us talk about muting and unmuting people. It’s actually quite easy. In the latest discord module, it was as simple as :
await member.edit(mute=True)
Other websites do suggest that you make a role for the person(s) you want to mute but this method wasn’t working for me, which is when I found the command above. Unmuting people is similar:
await member.edit(mute=False)
The next part is adding reactions to messages. This is also fairly easy, save the message in a variable, and then you can just use the Message.add_reaction(‘Unicode as a string’).
msg=await ctx.send('Hello World')
reactionEmoji='🙋♂️'
await msg.add_reaction(reactionEmoji)
This will add the emoji 🙋♂️ to your message.
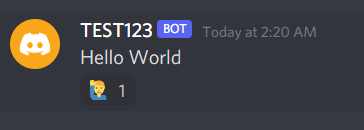
The next part is counting the reactions after a few seconds (I used the sleep() function to halt the program). To count the reactions you need to fetch the message. You can fetch a message via the message ID. (I would suggest that if it’s a message you have sent via the bot, you store the message in a variable and then fetch it using Message. id. Although there are other ways to do so if you haven’t sent the message). Once you have fetched the message use ‘.reactions’ this will return a list that contains the reaction objects. The reaction object stores the Unicode or the emoji attached to the message, a boolean value which is true if that reaction was added by the bot, and a count value that stores the reaction count. Hence to count the reactions all we have to do is access the ‘count’ value in the object.
msg=await ctx.send('Are we alone in the universe?')
reactionYes="✅"
reactionNo="❎"
await msg.add_reaction(reactionYes)
await msg.add_reaction(reactionNo)
await sleep(10)
newMsg=await ctx.fetch_message(msg.id)
react=newMsg.reactions
> [<Reaction emoji='✅' me=True count=2>, <Reaction emoji='❎'  > me=True count=1>]
reactionYesCount=react[0].count
reactionNoCount=react[1].count
if(reactionYesCount>reactionNoCount):
    await ctx.send('We are alone in the universe')
else:
    await ctx.send('We are not alone in the universe')
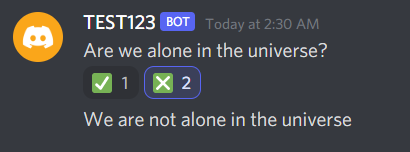
Chapter 4:
Embed and help
So you know how bots have a specific help command which tells you all about the bot and its command? Yes, let’s start making that.
The way the help command works is with an embed (You can also make it with a normal message but to make it more unique compared to the other commands I used the embed)
Let’s make the body of an embed.
embed=discord.Embed( title='StageHand Help Page', color=discord.Color.blue(), description="ALWAYS PUT NAMES OF ANY TYPE IN QUOTATION MARKS")

The output for the following code
Now it’s time to add your commands and their descriptions. Use the embed.add_field(name=‘This will appear bold and is the title of the field’, value= ‘The description for this field’, inline=True) to keep adding these (You can also put all of the information in the description in your embed, but you will lose the bold text which acts as a title of sorts). The field inline: boolean specifying whether the field is inline.
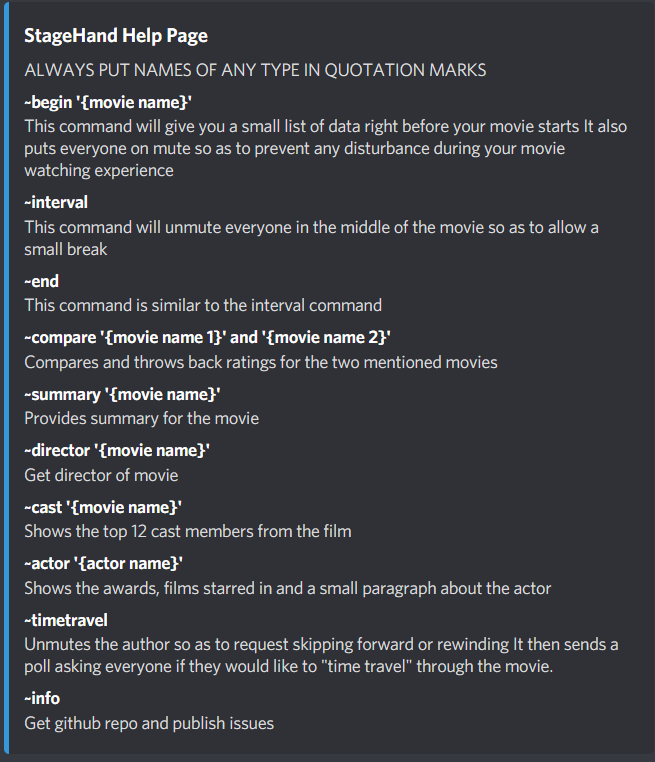
This is what my help command looks like.
CHAPTER 5:
TMDb api
After testing the bot with many movies, I started to notice some gaps with the IMDb module, where it wouldn’t return bits of information that often led to an exception being raised. This started happening quite frequently and thus I had to start looking for backups, that’s when I came across the TMDb api. Luckily the TMDb api has some good documentation and it also has a ‘try it out ’ tab which gives you the URL that you can open in another tab to see what the returned JSON would look like.
To get your TMDb api key, you need to set up a profile, click on my profile -> api and get your api key. Similar to IMDb TMDb also works with ids. Since this is a rest API you will need the requests module to send and receive data from the api. To download it run the following command
pip install requests
The following code is how you can get the movie id using the API.
import requests
url='https://api.themoviedb.org/3/search/movie?api_key='+TMDb_API_KEY+'&query='+movieName
response=requests.get(url)
if (response.status_code==200):
    res=json.loads(response.text)
    id=res['results'][0]['id']
    return id
else:
    print('error'+str(response.status_code))
In the first line, we import the requests module.
The third line is the URL we’ll be using to search for the movie.
In the 4th line, a GET request is made to the URL which returns a response code. We then check if the status code is valid. (There are three response codes that you can get 200,401 and 404. 200 is good, 401 means you have an invalid API key and 404 means the resource you requested couldn’t be found). Once we’ve got the JSON format we now need to navigate to the id. The json.loads() function is used to parse a valid JSON string and convert it into a python dictionary. Thus making it easy to navigate to the id. This same technique can be used to fetch other data as well, like the ratings, runtimes, movie credits of an actor, the overview of a movie, etc.
Chapter 6:
Conclusion
That is it! You have made your discord bot. There is a ton of discord documentation you can go through in case you still have any doubts. If you still need some help feel free to message me on Gmail or Discord. Here’s my GitHub repo for the bot.
